Bare Metal: OVHcloud
OVHcloud dedicated servers can boot a Kheeper host image directly with OVH's Bring Your Own Image (BYOI). You point OVH at our public image, paste a one-line token blob, and the server installs and auto-registers itself. Two ways to do it.
Option A — Control Panel (no OVH API token)
-
Generate the values for your host:
kheeper hosts ovh prepare myorg/web-01This prints an image URL, a checksum, an EFI bootloader path, and a small cloud-init blob containing a one-time token (valid 24 hours).
-
In the OVH Control Panel, open your server → Install → Bring Your Own Image, and paste the printed values into the matching fields. OVH's own BYOI guide has step-by-step screenshots of the form.
Set Image URL to the printed image URL, Image Type to
qcow2, and paste the Image checksum with Checksum typesha256: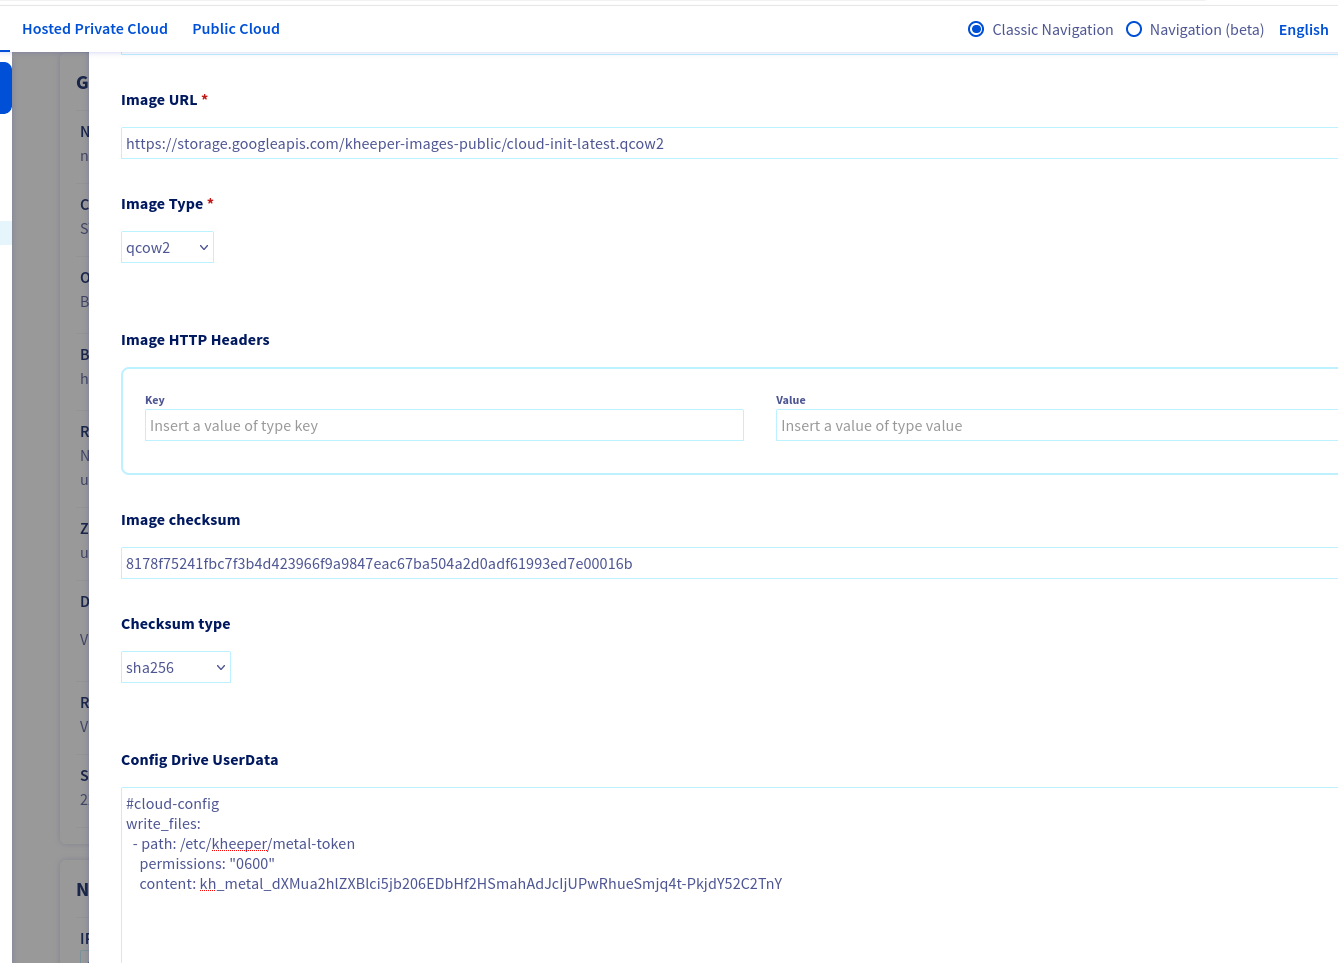
Paste the cloud-init blob into Config Drive UserData, leave the metadata empty, and set Path of the EFI bootloader to
\efi\fedora\shimx64.efi, then click Confirm: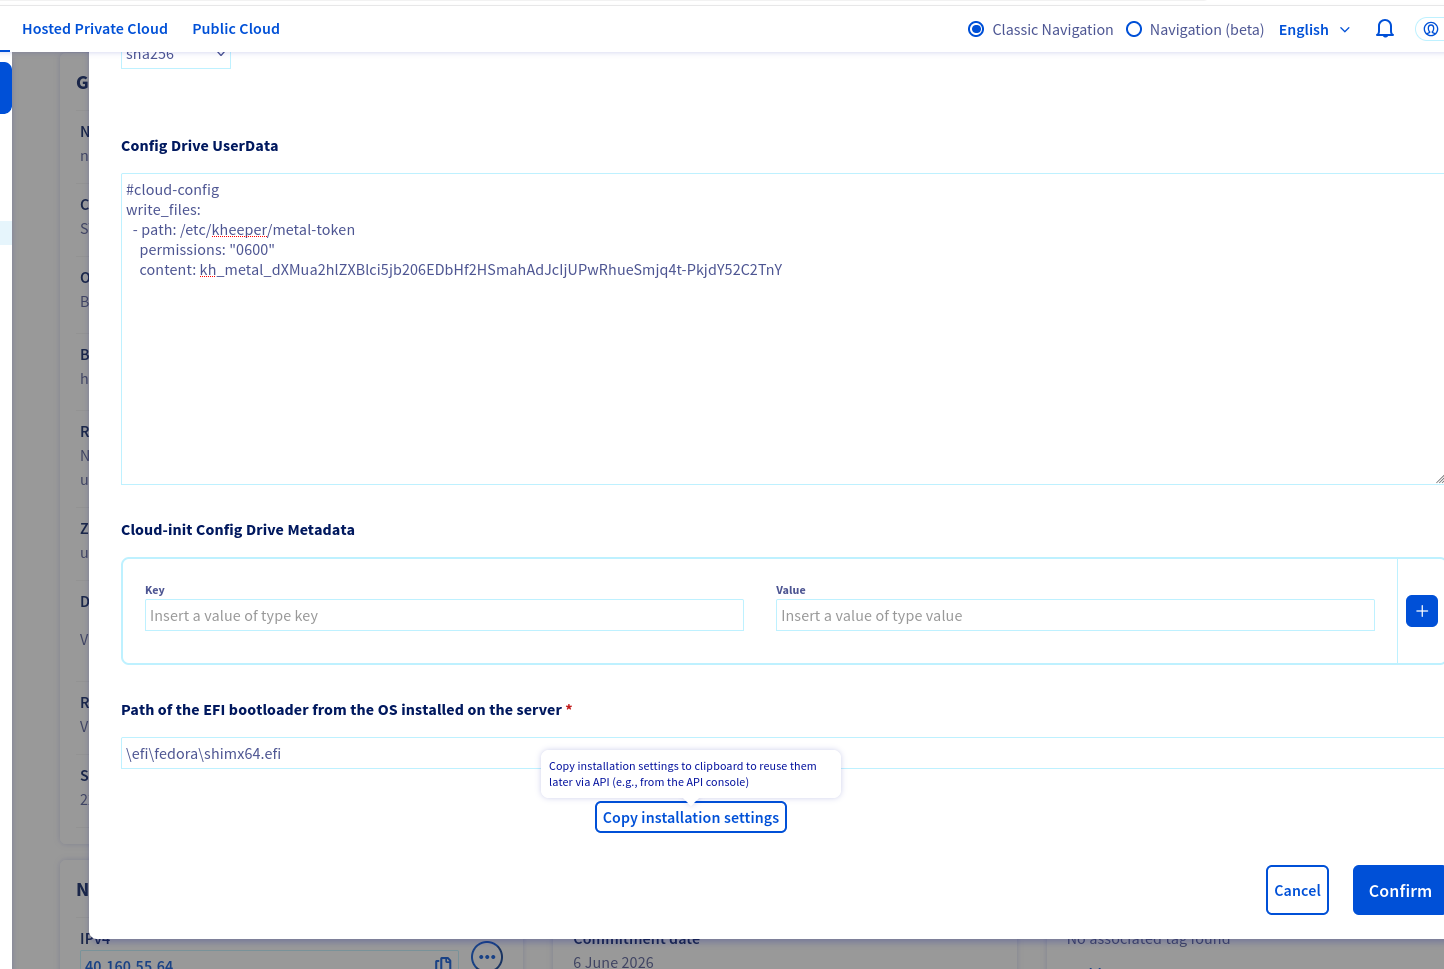
-
Start the install. After ten to thirty minutes the server boots the Kheeper image and auto-registers. Verify:
kheeper hosts list --org myorg
Option B — CLI (OVH API token)
If you'd rather not click through the panel, the CLI can drive the install for
you. Set OVH API credentials in the environment (or ~/.ovh.conf):
export OVH_ENDPOINT=ovh-eu          # ovh-eu | ovh-us | ovh-ca
export OVH_APPLICATION_KEY=...
export OVH_APPLICATION_SECRET=...
export OVH_CONSUMER_KEY=...
Create a token at OVH's token page for your region (e.g. https://eu.api.ovh.com/createToken/), granting:
GET    /dedicated/server/*
POST   /dedicated/server/*
Then run:
kheeper hosts ovh install myorg/web-01 --server ns1234567.ip-1-2-3.eu
It mints the token, kicks off the BYOI install, and polls until it finishes.
Notes
- The image must be smaller than the server's RAM minus 3 GiB (BYOI stages it in RAM). Our image is small; this only matters on very low-RAM servers.
- BYOI installs to a single disk (hardware RAID is fine; software RAID at install is not supported). See Working with Hosts to manage the host afterward.